Calibration Weights
High Quality Austenitic Steel, from 0.05 MG to 50 KG for All Your Calibration Needs
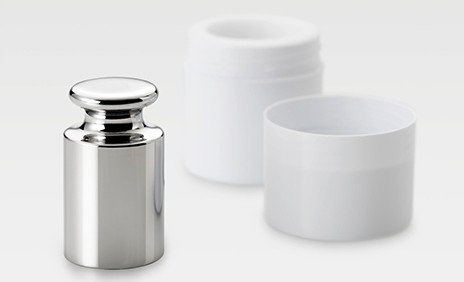
A calibration weight is a premium quality test weight used in the calibration of scales, balances, and reference weights. METTLER TOLEDO’s unique manufacturing process involves melting steel under vacuum (Class E1) and electrolytic polishing to produce calibration weights that are highly accurate and provide long-term stability. Choose from our range of wire weights, sheet weights, and knob weights (with or without an adjusting cavity).
Advantages of Using Calibration Weights

Balance Calibration Weights
Ensure accurate and reliable results by monitoring the performance of your weighing equipment using calibration weights. Routine balance testing is required by standards such as GMP and ISO 9001, and documented proof is often requested during audits.

Calibration Certificate Ensures Traceability
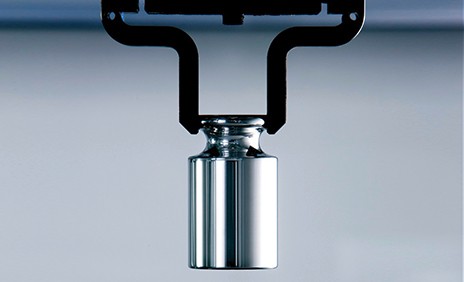
Using calibrated weights is the only way to ensure traceability and obtain accurate and reliable results. Our accredited mass calibration laboratories meet or exceed ISO/IEC 17025 standards.

Protection and Longevity
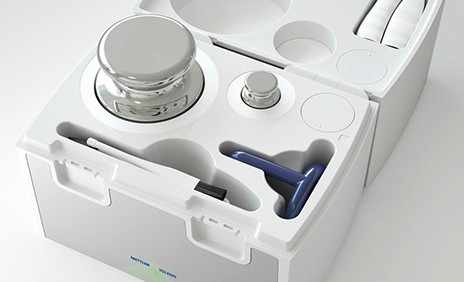
To protect the integrity of the weight and ensure a long lifetime, all calibration weights are supplied in a robust, easy-to-clean plastic container. Approved materials, including foam inserts, make them a durable solution.

Design and Construction
Our calibration weights are made from premium austenitic steel, ensuring high resistance to corrosion. Monobloc calibration weights are designed for long-term stability, and weights with an internal cavity can be adjusted without the need for specialized equipment.

Expertly Crafted
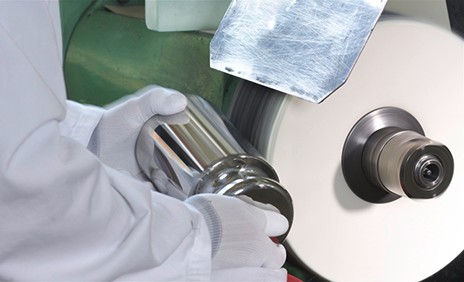
Our unique manufacturing process involves traditional mechanical polishing, final stage electrolytic polishing, fully automated cleaning, and final calibration using state-of-the-art mass comparators.

Stable Performance
Our proprietary electrolytic polishing provides a surface that is far smoother than using mechanical polishing. Thanks to the enhanced properties of the passive oxide film that is created on the calibration weight, long-term stability is assured.

CarePac Weight Sets
A CarePac contains two carefully selected weights for testing at the capacity of your balance and at 5% of its capacity - all that you need for safe and accurate weighing processes in between balance calibrations. Read more
Calibration Weights - Everything You Need to Know
- Calibrating Scales and Testing Requirements
- What calibration weights for scales and balances does METTLER TOLEDO offer?
- What is the difference between calibrated weights and test weights?
- What is the difference between balance calibration weights and scale calibration weights?
- How do I know which scale calibration weights I need?
- What are the different classes for OIML single calibrated weights?
- What are the different classes for ASTM single calibrated weights?
- Is it possible to purchase single calibration weights without a calibration certificate?
- Do I need to buy a full set of calibrated weights?
- How should I handle calibration weights?
- Do I need special tools to handle my calibration weights?
- What is the difference between a monobloc calibration weight and a calibration weight with an adjusting cavity?
- Are single calibrated weights monobloc weights or do they have an adjusting cavity?
- Are the milligram calibration weights (mg) sheet weights or wire weights?
- Do I have to calibrate my calibration weights?
- Does METTLER TOLEDO offer calibration of weights?
- What materials are scale calibration weights made from?
- Does METTLER TOLEDO offer scale calibration weights and balance calibration weights?
- What is the difference between weights for routine testing, scale calibration weights, and balance calibration weights?
Calibrating Scales and Testing Requirements
METTLER TOLEDO's world-leading expertise in metrology extends to test weights, weight sets and weight calibration services. Our weight portfolio covers weights according to OIML or ASTM from fifty micrograms to five tons in all accuracy classes. Our test weights are used all over the world, not only for testing balances but also as primary standards in mass laboratories.
Our proprietary electrolytic polishing process for knob and wire weights in the upper-class range eliminates microscopic protrusions in a weight’s surface. This makes the test weight far smoother when compared to weights finished with mechanical polishing. Thanks to the enhanced properties of the passive oxide film that is created on the test weight, the test weight’s long-term stability is improved.
Choose from a comprehensive selection of test weights and related calibration services. We offer weights and services of the highest quality – even for customers with a limited budget. Building on many years of experience and customer feedback, our weight boxes and accessories have an unmatched reputation. Profit from short recalibration times and trustworthy services. Use our global network of accredited mass laboratories for your next test-weight recalibration.
Test your balances securely, and in accordance with USP General Chapter 41 by using just two test weights to test at 5 % and 100 % of the capacity of each balance. Not only is this unique approach much faster, but it also substantially reduces test-weight purchasing and recalibration costs. CarePac® include tweezers, gloves and other accessories for professional weight handling.
Calibrating Scale: Premium-quality weights to satisfy stringent testing requirements
Calibrating scale testing requirements have become more complex, requiring that the scales survive years of use in rough industrial environments. Ensuring scale calibration is key to extremely accurate and efficient production using a fully calibrated scale. Test weights for scales are important tools for weighing scale calibration.
If a scale is not calibrated, it can significantly cost a company financially, and even worse, it can damage its reputation. METTLER TOLEDO’s calibrating scale/test weights are perfectly designed to support the testing and calibration of industrial scales. With a strong engineering focus on safe and productive testing, cast-iron weights up to 5 tons are perfect for this application, satisfying even the most stringent testing requirements. For washdown and hygienic environments, high-grade stainless-steel weights are the perfect choice for the best performance. These test weights are available in different shapes and accuracy classes to ensure proper scale calibration and scale recalibration.
Discover additional possibilities and test weights options, including solutions such as:
What calibration weights for scales and balances does METTLER TOLEDO offer?
METTLER TOLEDO offers balance calibration weights from 0.05 mg (50 µg) up to 50 kg for laboratory applications. For industrial applications, we offer scale calibration weights from 1 kg up to 5 tons.
Watch our video for more information on our calibration weight portfolio:
What is the difference between calibrated weights and test weights?
Calibrated weights and test weights are two expressions for the same thing. Calibration weights and test weights comply with OIML and ASTM guidelines and can be purchased with or without a calibration certificate.
What is the difference between balance calibration weights and scale calibration weights?
While there are different types of weight construction, the main difference between balance calibration weights and scale calibration weights is the nominal weight value. In the laboratory, weighing instruments are often referred to as balances. For such applications, METTLER TOLEDO’s weight portfolio includes balance calibration weights from 0.05 mg (50 µg) up to 50 kg. In industry, weighing instruments are often referred to as scales. For these applications, we offer weights for scale calibration from 1 kg up to 5 tons.
How do I know which scale calibration weights I need?
If you are unsure which calibration weights you need, our free GWP® Recommendation service helps you select the right weights for your application and process accuracy requirements. For a more comprehensive assessment of your needs, our GWP® Verification service provides you with a full routine testing and calibration schedule, including the test type, test frequency, calibration weights, and weight class according to your precise needs.
Contact your local METTLER TOLEDO representative for a free GWP® Recommendation.
Read more about our GWP® Verification service here:
Weighing Devices - Verifying and Maintaining Accuracy Over Time
What are the different classes for OIML single calibrated weights?
OIML single calibrated weights have classes E1, E2, F1, F2, and M1.
 |
What are the different classes for ASTM single calibrated weights?
ASTM single calibrated weights have classes 1 to 4.
Is it possible to purchase single calibration weights without a calibration certificate?
Yes, single calibration weights can be purchased with or without a calibration certificate. However, if it is necessary for you to be able to prove traceability, you should always purchase balance calibration weights and scale calibration weights with a calibration certificate.
 |
Do I need to buy a full set of calibrated weights?
To test your balance or scale, only two calibrated weights are required. We recommend using one calibrated weight equivalent to the capacity of your weighing instrument and a second calibrated weight equivalent to around 5% of the capacity. You may wish to use a third weight to test your balance around a specific weight value. You can purchase our calibrated weights separately, or our CarePacs offer a cost-effective solution. Each CarePac contains two selected weights and weight handling tools appropriate to the weight value together in one convenient easy-clean plastic box. However, if you have many balances or scales with different capacities, a full set of calibrated weights may be the more cost-effective option.
 |
How should I handle calibration weights?
Spheres are used because the volume can be determined according to the definition of volume by a length measurement. Silicon (Si) spheres have the same homogenous atomic structure as a perfect diamond without voids or dislocations, so the density is more accurate than other materials. This is why a silicon sphere with a homogenous atomic structure serves as a reference for specialized volume measurement.
There are some golden rules for handling calibration weights for scales and balances that also apply to all knob, sheet and wire weights:
- Store in the container provided
- Keep clean
- Acclimatize before use
- Used dedicated tools for handling
- Never touch with bare hands
For further information and more valuable tips:
Watch our video:
Download our weight handling guide:
Correct Test Weight Handling Guide: 12 Practical Tips
As a handy reminder, download our weight handling poster to hang on the wall close to your balance or scale:
Laboratory Poster: 10 Practical Tips for Correct Test Weight Handling
Do I need special tools to handle my calibration weights?
Yes, you should never touch a calibration weight with your bare hands. This prevents oils and dirt being transferred to the surface of the calibration weight and protects its integrity over time. Appropriate weight handling tools are provided with our weight sets and CarePacs or the tools can be purchased separately.
What is the difference between a monobloc calibration weight and a calibration weight with an adjusting cavity?
Monobloc calibration weights are made in one solid piece whereas a calibration weight with an adjusting cavity has a top that can be removed to reveal the cavity within the body of the weight. During the weight calibration process, minor adjustments can be made to the overall weight value by adding or removing special material. This should only be carried out by accredited calibration laboratories.
 |
Are single calibrated weights monobloc weights or do they have an adjusting cavity?
METTLER TOLEDO offer monobloc calibration weights as well as calibration weights with an adjusting cavity. However, the construction depends on the weight class as can be seen in the table below.
| Weight Class | E1 | E2 | F1 | F2 | M1 |
| Cavity | ✓ | ✓ | ✓ | ||
| Monobloc | ✓ | ✓ | ✓ |
Are the milligram calibration weights (mg) sheet weights or wire weights?
METTLER TOLEDO offers both sheet and wire milligram calibrated weights. However, the shape depends on the weight class as can be seen in the table below. In the higher weight classes, E1 and E2, only wire weights are available. This is because their smaller surface area, in comparison to sheet weights, makes them less susceptible to the effects of air buoyancy and the influences of air drafts. Hence, their higher level of accuracy.
| Weight Class | E1 | E2 | F1 | F2 | M1 |
| Sheet | ✓ | ✓ | ✓ | ||
| Wire | ✓ | ✓ | ✓ |
 |
Do I have to calibrate my calibration weights?
Calibration of weights on a regular basis is essential if accuracy, repeatability, and traceability are important to you. Scale calibration weights and balance calibration weights will need to be sent to a special service provider to be calibrated against weights of a higher weight class. You may find it useful to have a second set of calibration weights so that you can continue to test the performance of your balances and scales while the other set is being calibrated.
Does METTLER TOLEDO offer calibration of weights?
Yes, METTLER TOLEDO offers the calibration of weights in several countries around the world. Please contact your local representative for further information.
What materials are scale calibration weights made from?
METTLER TOLEDO scale calibration weights and balance calibration weights are made from premium stainless steel to provide extremely high resistance to corrosion. Monobloc calibration weights are designed for long-term stability, which is further enhanced by electrolytic polishing processes. Calibration weights with an adjusting cavity simplify weight adjustment for calibration laboratories who can access the cavity without the need for highly specialized equipment.
Does METTLER TOLEDO offer scale calibration weights and balance calibration weights?
Yes, our calibrated weights are intended for routine testing of balances and scales.
What is the difference between weights for routine testing, scale calibration weights, and balance calibration weights?
There is no difference. METTLER TOLEDO calibrated weights can be used for both routine testing and the calibration of balances and scales.


